Step By Step Guide
1) You can create a new estimate quickly by clicking the + New button " located in the top right corner of the page, next choose "estimate" from the drop-down menu.
![]()
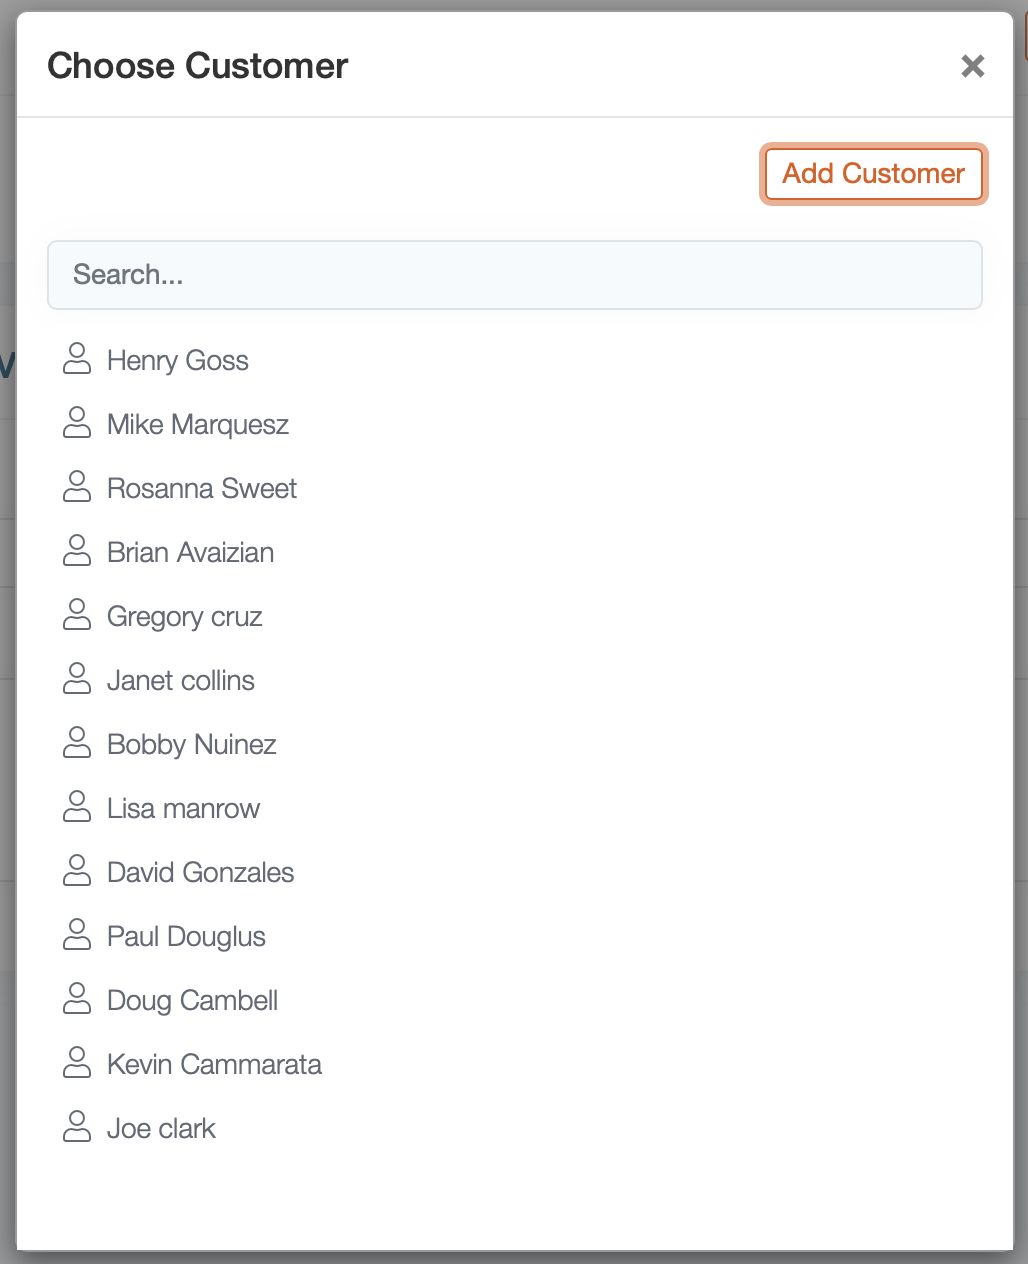
2) The next step is to add the customer. You have two options: choose an existing customer or add a new customer.
- For this example, we're going to choose an existing customer by clicking on their name. Search for the customer if your list is long.
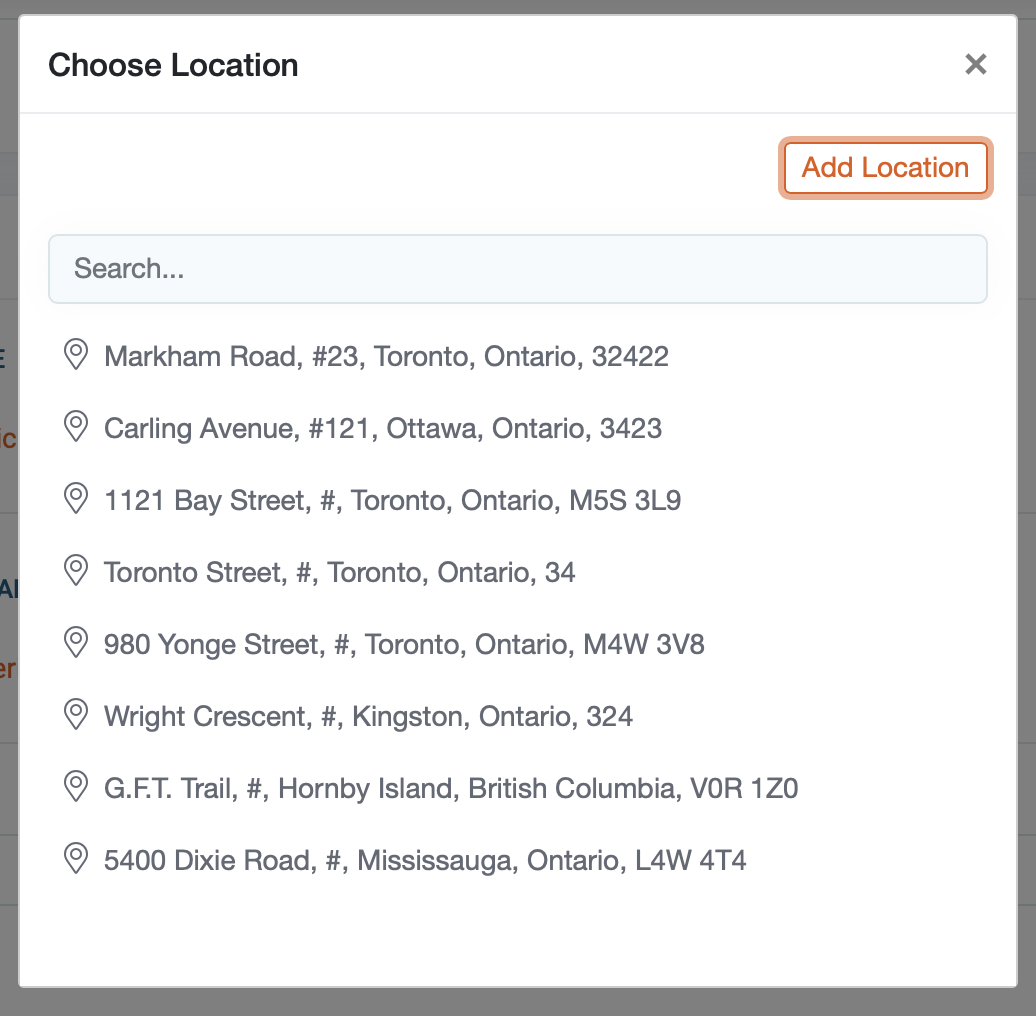
 3) Next, choose the customer's property location. If the customer has multiple properties, they will be displayed on this list.
4) For this example, we're going to add a new customer by clicking the "Add customer" button.
5) Next, Fill out the required customer information and click save. 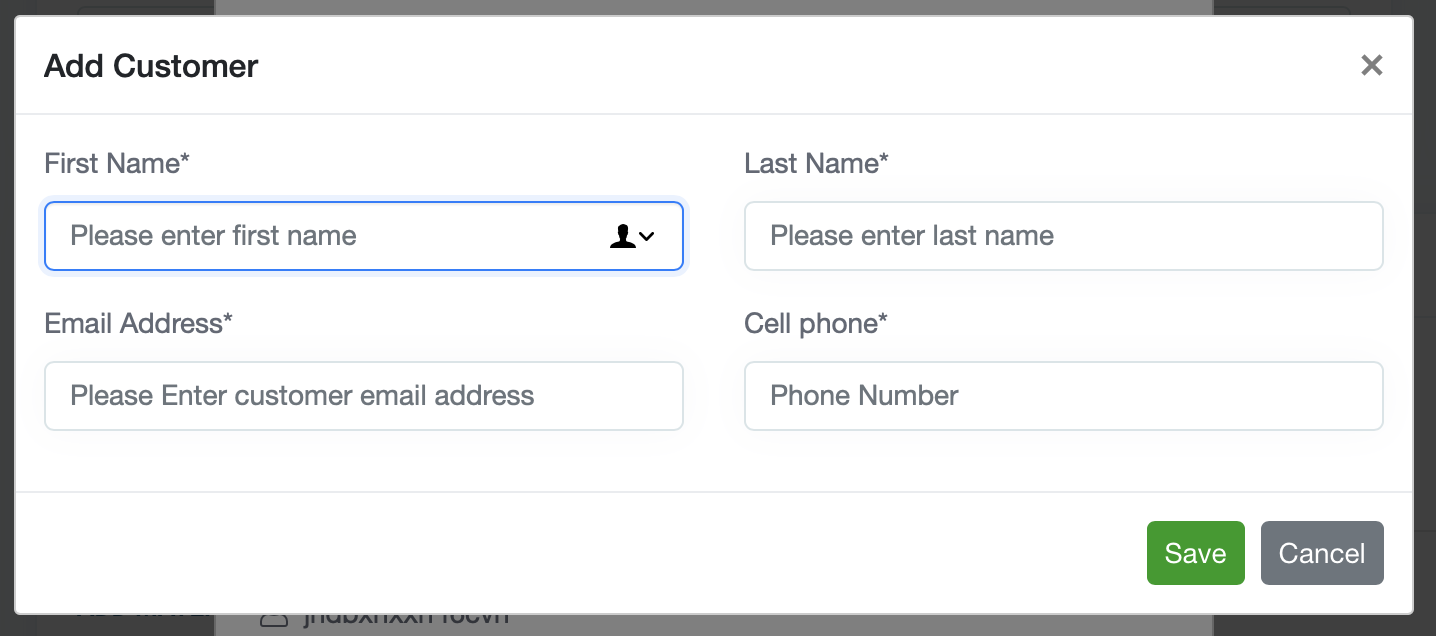
6) Next, You'll be prompted to add the location, to do so click "add location" button.
7) Now fill in the required customer location information and click save.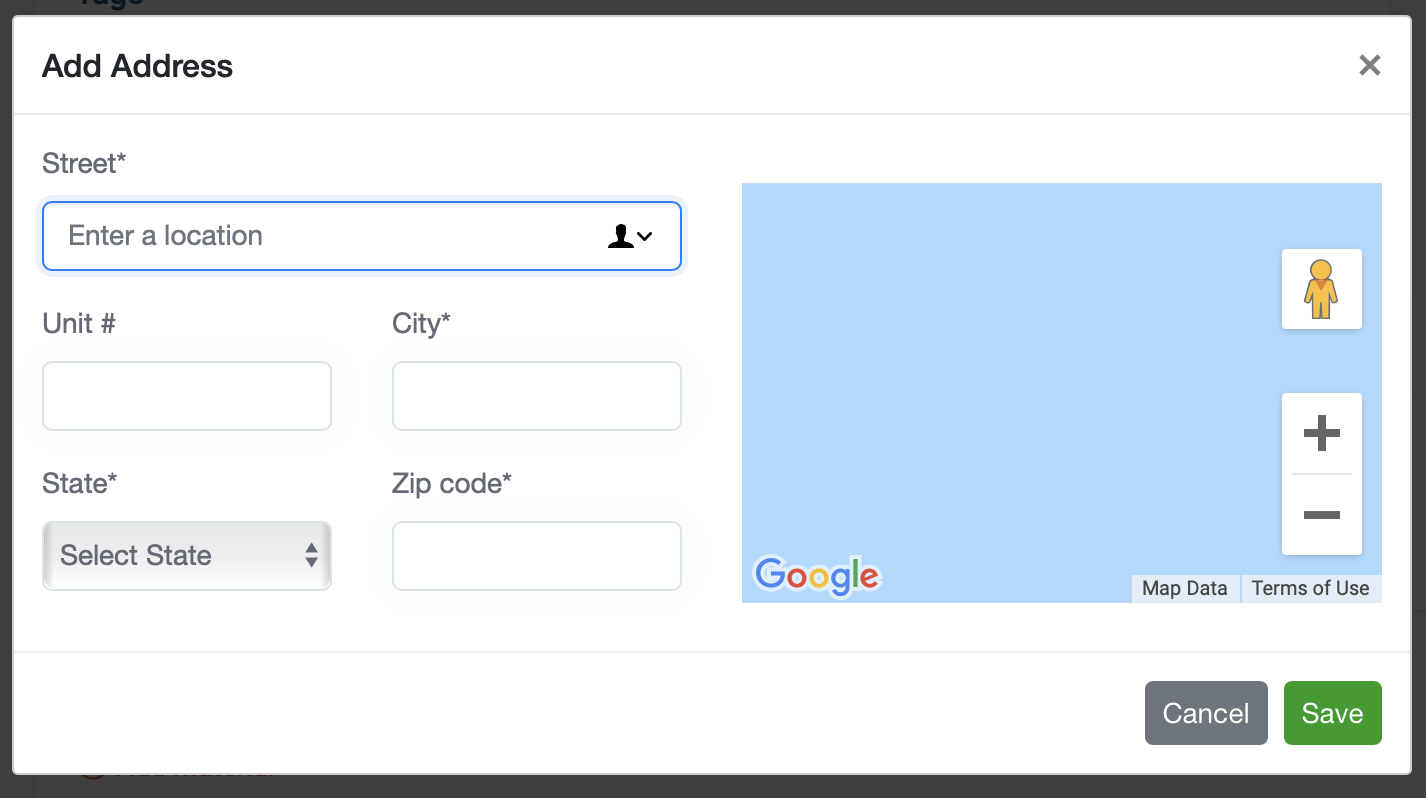
8) Now that the estimate is generated, you will see the estimate number and status in the upper left corner. Draft means no action has taken place since the estimate was created. If you email the estimate to your customer, the status will change to sent to client. Status change to reflect your last action.
![]()
9) The panel located on the left side of the page provides some useful information regarding the property. You can edit the customer location by clicking on the pencil icon to the right of the customer's address.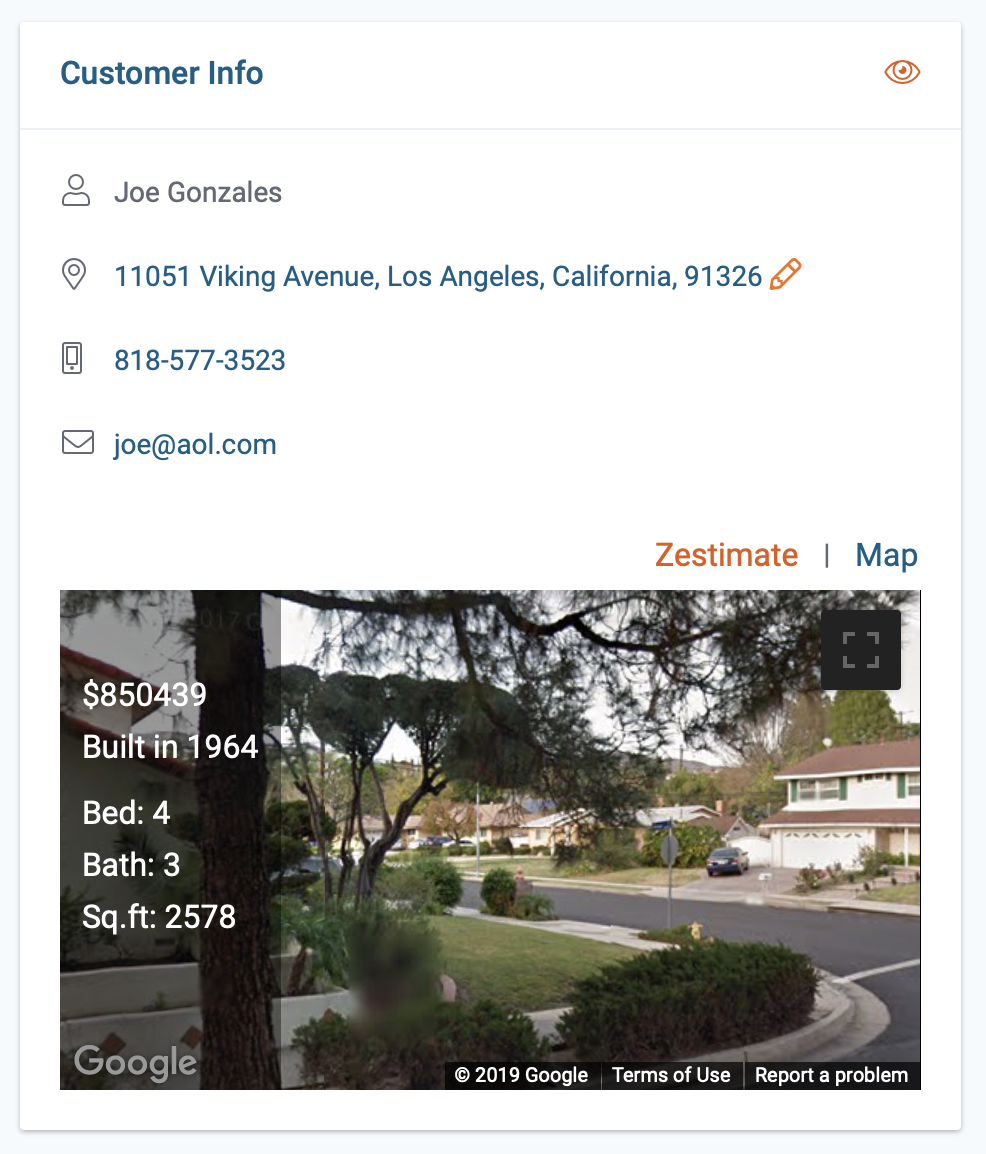
10) The next step is to choose when you want the estimate to expire (optional) Estimate reminder notification is sent three days before the estimate is set to expire.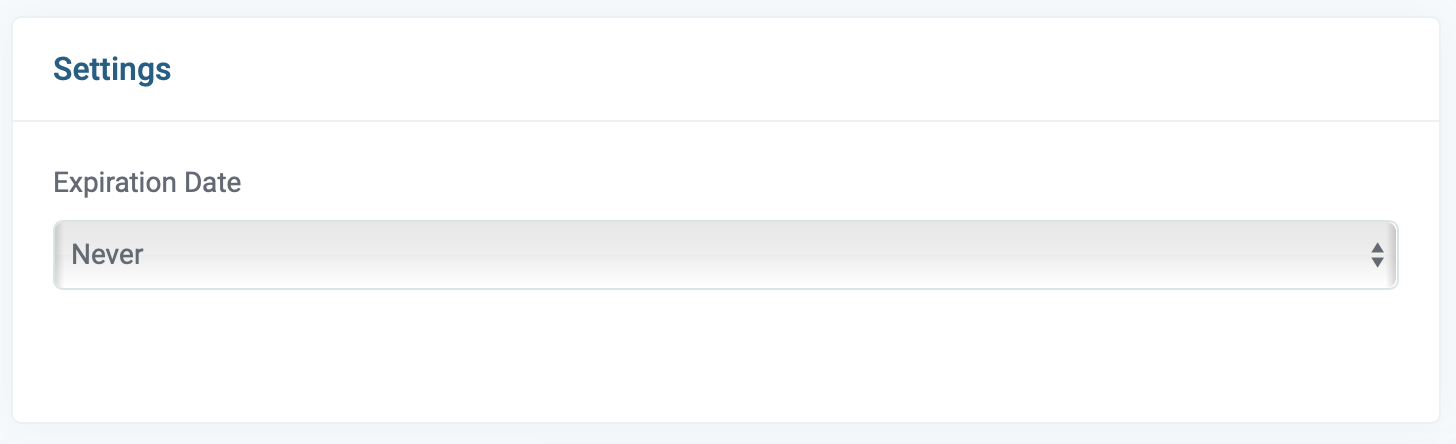
11) Let's add some tags. Tags are internal identifiers (customers cannot see tags) there used for distinguishing specific job details like type of job or lead source. They categorize your jobs and can be used to filter and search within your dashboard reports.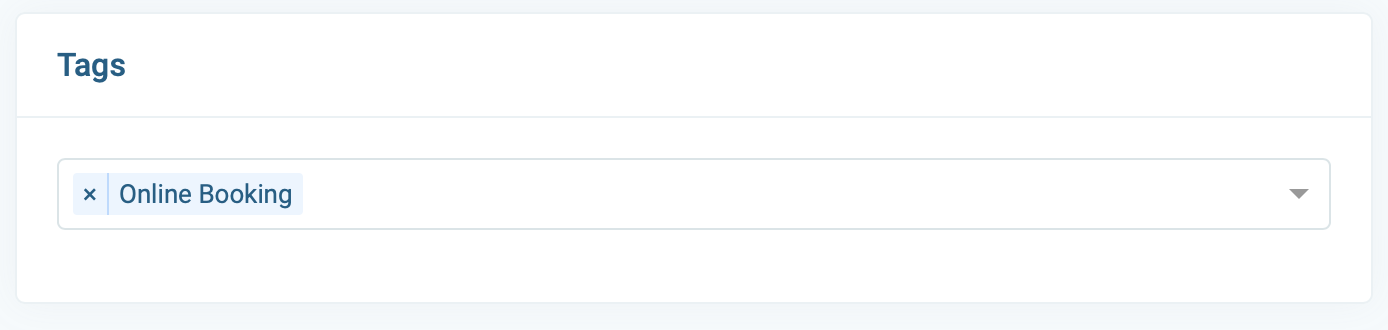
12) Next, it time to add line items for your services and materials. Enter the description, quality, and rate. If the item is taxable then check the "tax" box. Click the "+ add service" or " + add material" to add new line items.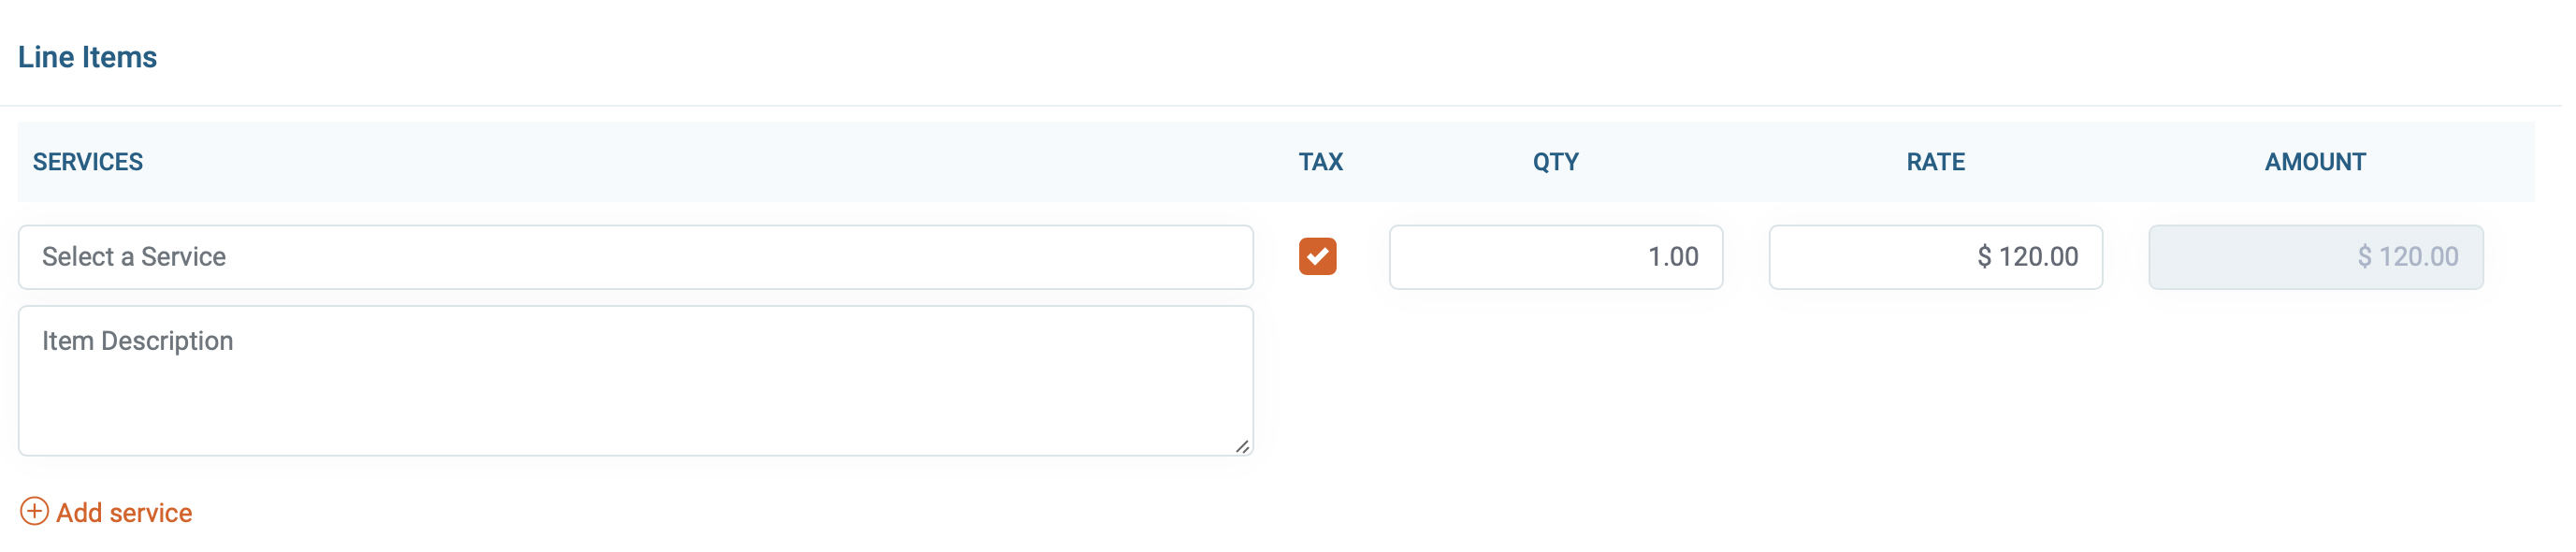
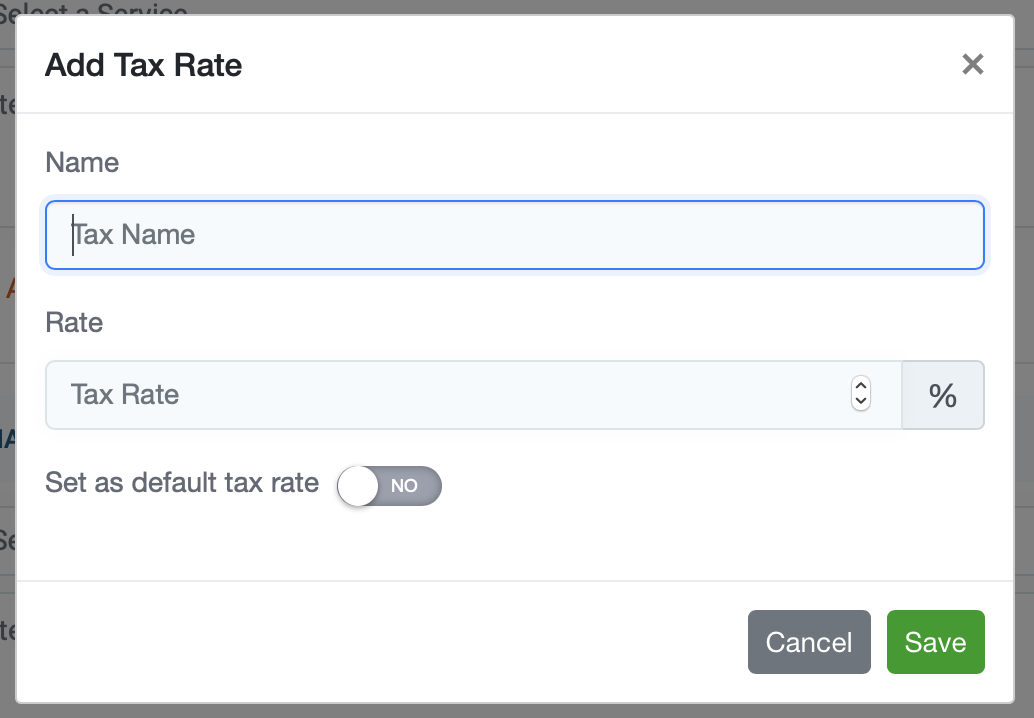
13) Next, choose the “Tax rate” from the drop-down menu. To add a new tax rate click the orange plus sign. You have the option to set the tax rate as default for all future jobs.

14) The total will be displayed at the bottom right corner of the page, with the option to add a discount. Discounts can be added in the form of a % percentage or a $ dollar amount.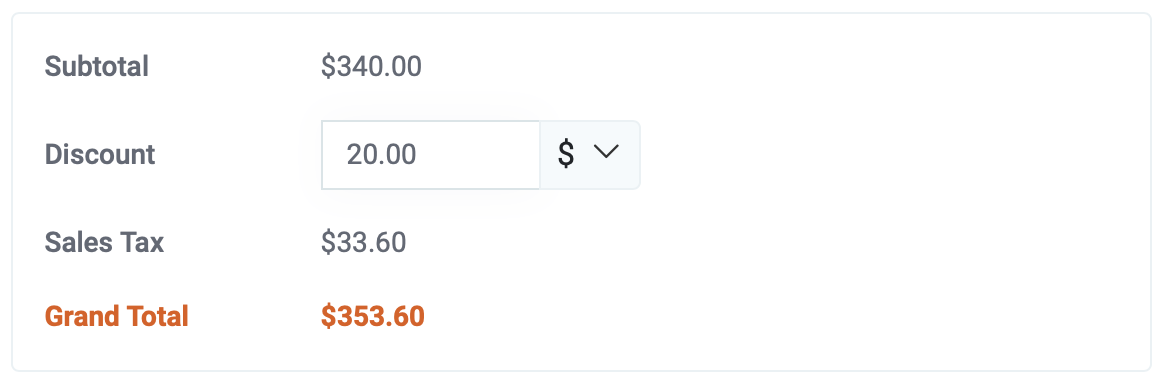
16) When you're done, save the estimate by clicking the Save button located in the bottom right corner of the page.